Please read in here first. These are the Rules and Guides for being "part" of the clan. You can also apply to the various Guilds here.

Moderators: Clan Council, Moderators, Guild Councilors

User avatar
Sirapyro
Site Admin
Posts: 3092
Joined: Sun Jul 22, 2012 10:18 pm
RS3 Name: Sirapyro
Quest Points: 500
Location: California, United States
Contact:

How to Register on and Use the Offsite

Postby Sirapyro » Mon Jun 19, 2017 5:30 am

Hello, and welcome to the official Clan Quest website! Below are a few guides on how to register your account, post on or create threads, and set up your personal profile!

Table of Contents

User avatar
Sirapyro
Site Admin
Posts: 3092
Joined: Sun Jul 22, 2012 10:18 pm
RS3 Name: Sirapyro
Quest Points: 500
Location: California, United States
Contact:

Re: How to Register on and Use the Offsite

Postby Sirapyro » Mon Jun 19, 2017 5:30 am

How to Register on the Offsite
Registering on our clans website is fairly simple, but you may have a few questions or concerns regarding some areas of registration.


Step 1:
Click the "Register" Button at the top right corner of the website, outlined in red in the below image.
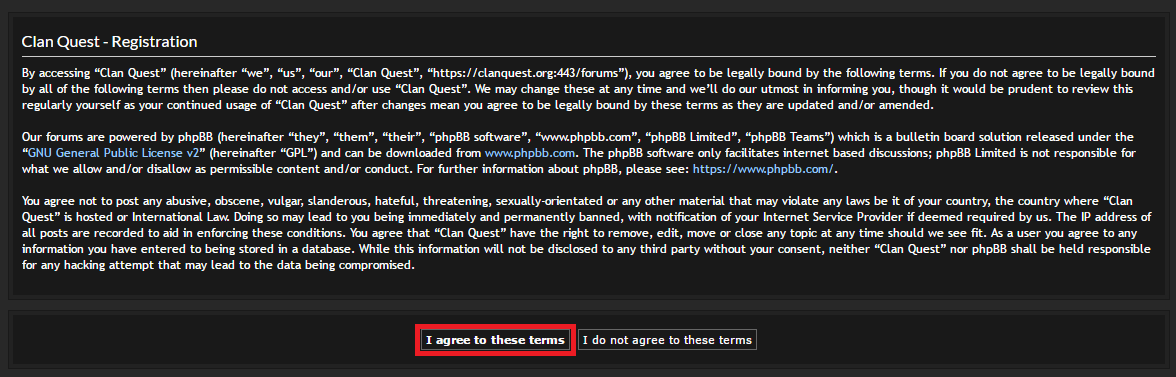
Image


Step 2:
Clicking the "Register" button will take you to a screen where you will be presented with our terms. After you have read through them, click "I agree to these terms" at the bottom of that page.
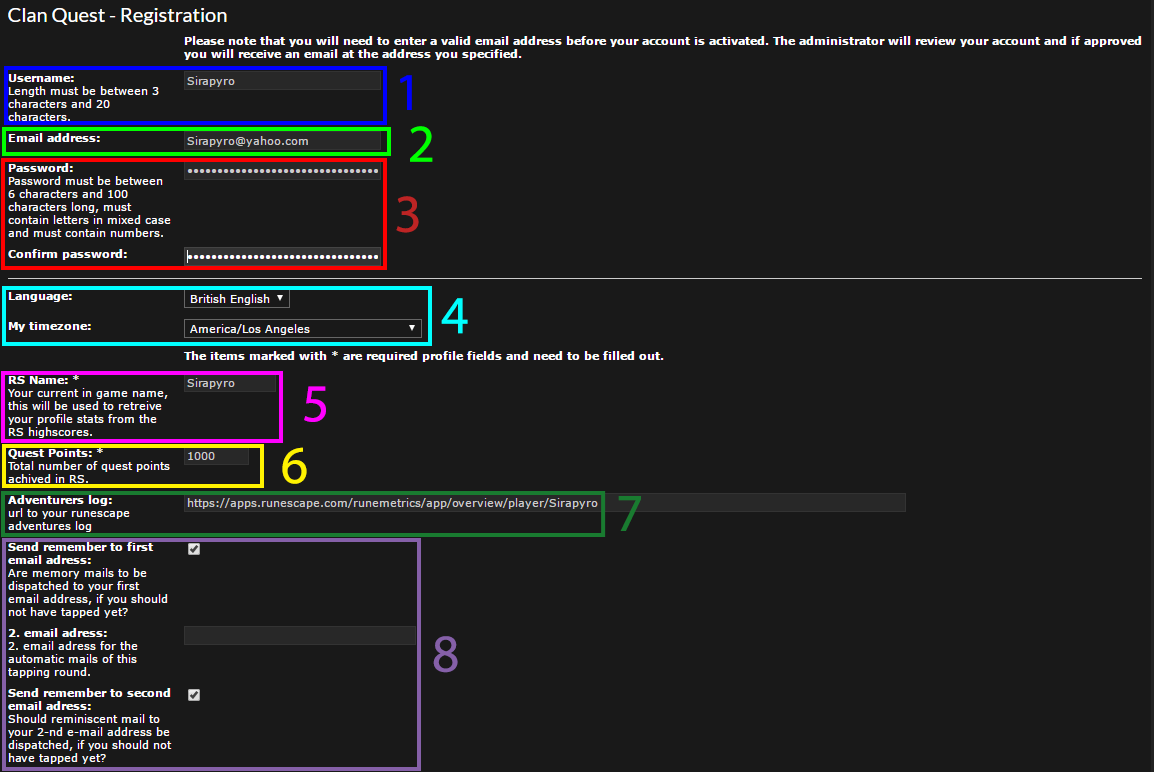
Image


Step 3:
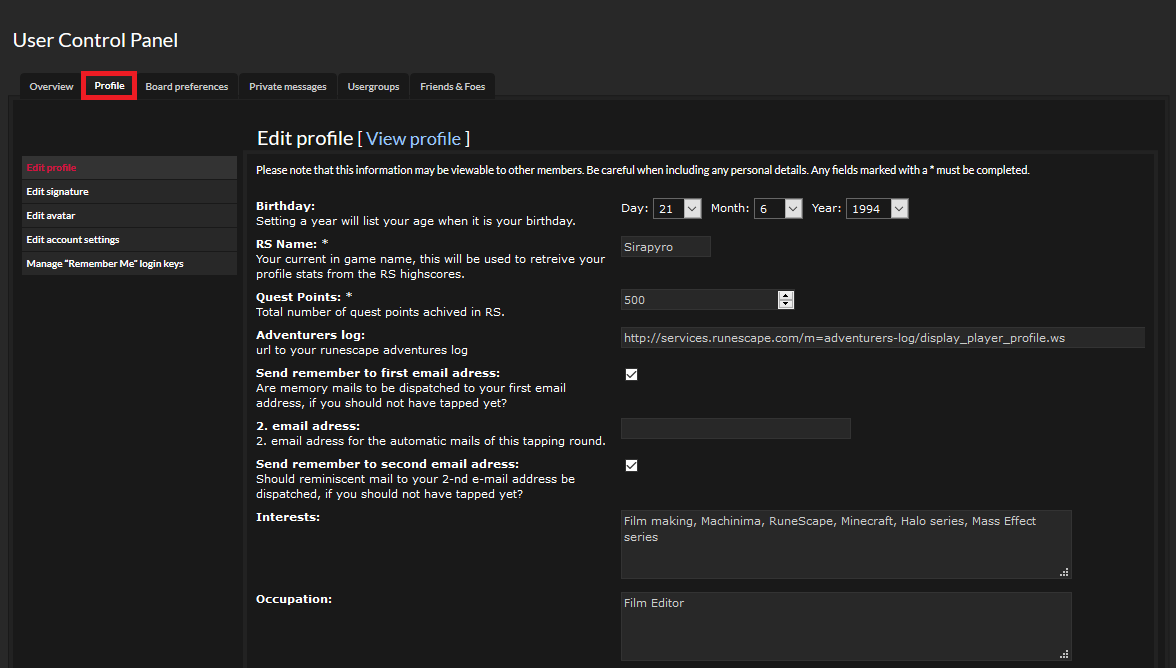
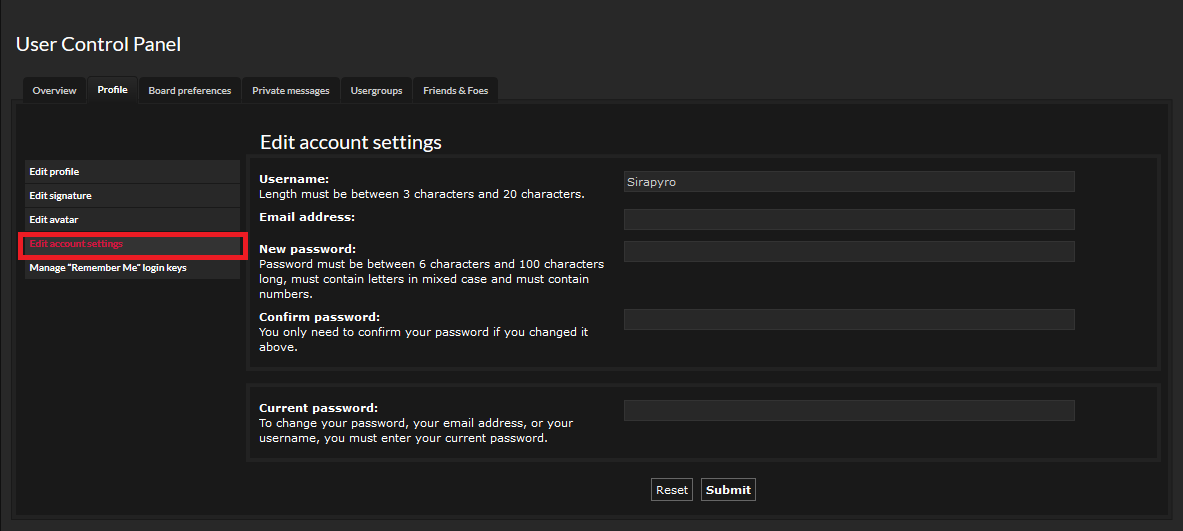
You should now be on a screen with various different entries to fill. These include your username, your password, email, basic game Information, etc.
Image
  1. Username (Required): Enter the name you wish to go by on the forums. Typically this should be the same, or similar, to your ingame username so people can more easily identify you.
  2. Email (Required): Enter the email address you wish to use to register your account.
  3. Password (Required): Enter the password you wish to use for this website, and then reenter it. Please note that you should never reuse passwords across multiple sites. We require all passwords to be at least 6 characters and contain at least one number, one lower case letter, and one upper case letter.
  4. Language and Timezone: At this time we only offer British English as a language. Click the drop down menu next to "My timezone" and select the area nearest you. This will set the websites clock to match your own.
  5. RuneScape Name (Required): Enter your current RuneScape display name here. It may or may not be the same as the username you specified in point 1.
  6. Quest Points (Required): We're the Questing Clan, we want to know how many Quest Points you have ingame! You can check this by simply clicking your Quest Journal. This entry must be a number between 1 and 1000.
  7. Adventurer's Log/RuneMetrics Profile: Enter the link to your RuneMetrics profile here. If you want to do this quickly, simply replace "Your_Runescape_Name" with your current RuneScape name.

    Code: Select all

    https://apps.runescape.com/runemetrics/app/overview/player/YOUR_RUNESCAPE_NAME
  8. Secondary Email: Optionally, you can determine a secondary email address you can use to recover your account should you be locked out of your first one. You can also use the check boxes to determine which email you want recovery information sent to.


Step 4:
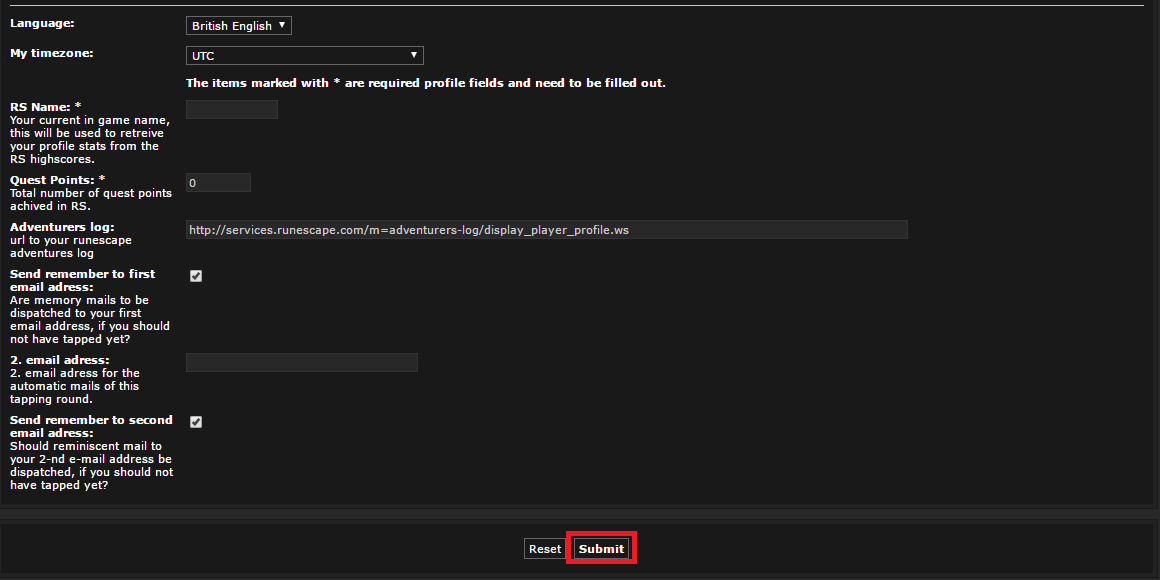
Once you have filled out all of the information above, you may be requested to complete a simple Captcha to ensure you're not a robot. Once that's done, simply click the "Submit" button at the bottom of the page. If you wish to restart your application instead, you can click "Reset" to do so.
Image


Step 5:
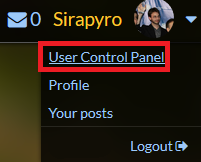
Your account has now been created, but you will notice that you are still unable to access our forums. This is because your account must now be activated by a site administrator. We do this to prevent an overwhelming amount of spam bots to access the website. It should usually not take us more than an hour to activate your profile, but you may contact any member of the clans High or Low Councils once you register to get activated sooner.


Step 6:
Now that your account has been activated, enjoy! You now have access to the full features of our website, including the forums.
User avatar
Sirapyro
Site Admin
Posts: 3092
Joined: Sun Jul 22, 2012 10:18 pm
RS3 Name: Sirapyro
Quest Points: 500
Location: California, United States
Contact:

Re: How to Register on and Use the Offsite

Postby Sirapyro » Mon Jun 19, 2017 5:31 am

How to Set up Your Profile
Now that you've registered your account, you may want to give yourself a profile picture, a signature, or edit other details about yourself. Read on for information on how to do this.


Accessing your profile
To start editing your profile, you must first know how to access it. To start, click the drop down next to your name in the top right corner of the page.
Image
You will see a few different options, you want to click the "User Control Panel". Clicking "Profile" will take you to to a general overview of your profile, but will not offer any options to edit it, so you do not want this.

Once you have clicked on the User Control Panel, you should see a page that resembles this:
Image
This is your User Control Panel, and from here you can use the various tabs to customize your forum appearance, personal information, preferences, etc.


Profile Settings
Most of the settings you will want to change will be under the "Profile" Tab.
Image
Within the Profile Tab there are a number of different sub-tabs that allow you to customize different areas of your profile.


  • Edit Profile: The first tab you will see is your "General Profile", which is where you can add information about yourself, such as your birthday, RuneScape information, Interests, occupation, location, social media, etc. It is completely up to you how much you want to fill this section out, and we urge you not to fill it out any more than you are comfortable doing.
  • Edit Signature: The next tab is for your "Signature" settings. Your signature is a pre-defined message that will display underneath all posts you make across the forum.
    Image
    Your signature can include pictures, smilies, links, or anything else you're creative enough to come up with! However, there is a 1,000 character maximum limit.
  • Edit Avatar: The third tab allows you to change your avatar, also known as your profile picture, which will display next to every post you make. It is essentially your face on the forums!
    Image
    You can either paste a link to an image you wish to use in the "Upload from a URL" box, or you can directly upload a file from your desktop. Please note that all profile pictures must have no more than a 200x200 pixel dimension, and should be no larger than 195 kilobytes.
  • Edit Account Settings: The fourth tab is where you are able to update your password or change your accounts username or email.
    Image
    Please note that in order to modify these settings you will have to first enter your current password. If you cannot remember this, then please contact a board administrator.


Board Preferences
Now that you have gone through these four major areas, your profile is pretty much good to go. However, if you want to further customize the way you are notified about new posts on the forum, you can continue on the the board preferences.
Image
There are a few different sections within the board preferences tab, much like the profile tab. I won't go into as much detail with these settings, as they are mostly simple "Yes or no" for different scenarios. For example:
Image


And that's about it. You can continue to explore the rest of the settings in the User Control Panel, but most of the actual personality of your profile comes from the settings above.
User avatar
Sirapyro
Site Admin
Posts: 3092
Joined: Sun Jul 22, 2012 10:18 pm
RS3 Name: Sirapyro
Quest Points: 500
Location: California, United States
Contact:

Re: How to Register on and Use the Offsite

Postby Sirapyro » Mon Jun 19, 2017 5:35 am

How to Use the Forum
Forums are fairly straightforward to use, but nevertheless here is a basic guide to posting on the forum, as well as some of the additional features you can use while browsing.


Creating a New Thread
Threads are the staple of any forum, and sometimes you'll want to create your own. Click the forum you want to post in, then click the button near the top left corner:
Image
Once you click the "New Topic" button, you will be presented with a new screen with several different options and fields to fill out.
Image
It's fairly easy to figure out, but as a brief overview of the functions:
  1. Subject: The title of your thread.
  2. BBCode: These are special phpbb code features that allow you to use bold, italics, underlines, add images, videos, change text size, color, position, etc. A more in depth guide on these can be found HERE(guide imminent).
  3. Text Box: This is where the actual contents of your post go.
  4. Smilies: These are our selection of smilies. The image above may not be accurate over time. I think people know how these work!
  5. Submit/Preview/Save Draft: Using these buttons, you can either post your thread for others to see(submit), preview it so you can see how the final product looks with coding applied (preview), or save a copy of your work to come back to layer (save draft).
  6. Options: This menu contains a few specific extra options for your post, such as disabling smilies, BBCode, smilies, etc.
  7. Attachments: Under this menu you can upload attachments(images) to the offsite. Normally you should avoid doing this, and instead follow image-posting guides such as this one.
  8. Poll Creation: You can create a poll for users to vote in on this tab.
    Image
    The tab itself is fairly user friendly, and thoroughly explains what you need to do. Just make sure you remember that only a maximum of 64 options can be used.


Posting on a Thread
Posting on a pre-existing thread is almost exactly the same as creating a new thread, only with slightly less options. First, click on the thread you wish to respond to, then click the "Post Reply" button at either the top or bottom of the page.
Image
I will not go into as much detail as I did with creating a new thread, because the interface is almost exactly the same.
Image
As you can see, the only real difference is that you cannot create a poll on a response, only on a brand new thread.
If you want to edit an existing post, you simply need to click the "Edit" button present on every one of your posts. Alternatively, if you wish to quote something someone has said, you can click the "Quote" button present at the top right corner of every post.
Image


Browsing the Forums
When browsing the forums, you will notice either a grey or blue quest icon next to each thread or forum. Those with a blue symbol have new, unread posts in them, while those with a grey symbol do not.
Image
You are free to browse at your leisure, only clicking on the forums or threads that interest you. If you wish to mark everything as read, you can do so by pressing the appropriate button underneath the forums section, but above the statistics section.
Image
Alternatively, you can use the "New Posts" or "Unread Posts" buttons at the top right corner of the page to quickly browse through the forums.
Image
  • New Posts: This page will display all recent posts, whether or not you have already read them.
  • Unread Posts: This page will display every single thread on the forum which has unread messages in it, making it a quick and easy way to catch up.

Forum/Member Information
At the bottom of the main page of the forum you will notice a separate section, this is where you can find information on the forum groups, see who's online, see who has birthdays coming up, and check general forum statistics.
Image
If you want to see more information about who is online you can click the outlined "WHO IS ONLINE" link in the image above.


Sending Private Messages
There are two ways to send a private message to someone on the forums.
METHOD 1: User Control Panel
First, you must access the user control panel by clicking the drop down menu by your name in the top right corner of the site.
Image
Once you have reached the User Control panel you will see various tabs, reading "Overview", "Profile", etc. You want to click on the tab that says "Private Messages".
Image
You will now be on the master page in which you can view your inbox, outbox, message drafts, send messages, and compose new messages. In order to compose a new message you may click either the "new pm" button at the top, or the "Compose message" button on the left.
Image
You will now be presented with a new screen that where you may compose and send your new private message. The text box and BBCode bar are exactly the same as they are for posting on threads, which you can review here. There are also a few additional features unique to Private messages you should keep in mind, which have been numbered.
Image
  1. Add Recipients: In this box you can type the name of the person(or people) you want to send a private message to.
  2. Add: Clicking the "add" button underneath the "Add recipients" box will confirm that you are sending a message to whoever you listed.
  3. Add Groups: On the right there is an "Add groups" window that allows you to add all members of a given usergroup to your private message. Simply click the group you want, and then press the "Add" button from step 2.
It should also be noted that you may click the "Find Members" button to bring up a list of the entire websites roster. However, it does this by opening a new window, and the menu itself can be confusing to navigate, and is often unnecessary. This usually only comes in handy when you do not know the exact spelling of a users name, in which case you should refer to method 2 below.
Once you have chosen who you want to send your message to and finished the contents of the message itself you can send it by clicking the "Submit" button at the bottom of the page. Make sure everything you've written is exactly the way you want it before sending!
Image
METHOD 2: Direct Messaging
Instead of using the User Control Panel to message someone, you can do it much quicker by going through their profile instead. Whenever a user makes a post their profile picture and other information appears to the left of said post. Clicking their username will take you to their profile.
Image
Here you can view information about the user, but more importantly you can click the convenient "Send Private Message" button on the bottom left, in the "Contact" section highlighted below.
Image
You will now find yourself on the same Private Message text window from Method 1, and from there it works exactly the same way. Happy messaging!


View All of Your Posts
If, for whatever reason, you wish to view all posts you have ever made on the forums, you may do so by clicking the drop down menu next to your name in the top right corner of the website and clicking "Your Posts".
Image
This menu will display every thread you have ever posted on, organized by newest post. However, if you specifically want to view only your own posts across all threads, then you instead need to click the "Profile" button in the drop down menu, rather than "Your Posts". This is a very important distinction.
Image
Once you have reached your profile page, you can click the "Search User's Posts" button in the "User Statistics" section. This can be done for any user, though you will only be able to see someones posts in forums you have access to.
Image


And that about covers the basic functions of the forums, enjoy!

Return to “Welcome to Clan Quest”


Who is online

Users browsing this forum: No registered users and 2 guests